Categories
Business

How to start as a Software Engineering contractor in the UK

In my last post I wrote about how easy it is to register a limited company in the UK. Registering your company is, however, just the first step on the road to running a business. In this post I’ll outline how I went about getting a business bank account, getting insured, hiring an accountant and getting my first contract.

I don’t claim that my way is perfect and every business is different. You shouldn’t consider anything written here to be financial or legal advice, it is just a reference for how I did things. I recommend anyone setting out on this journey conducts their own research from multiple trusted sources.

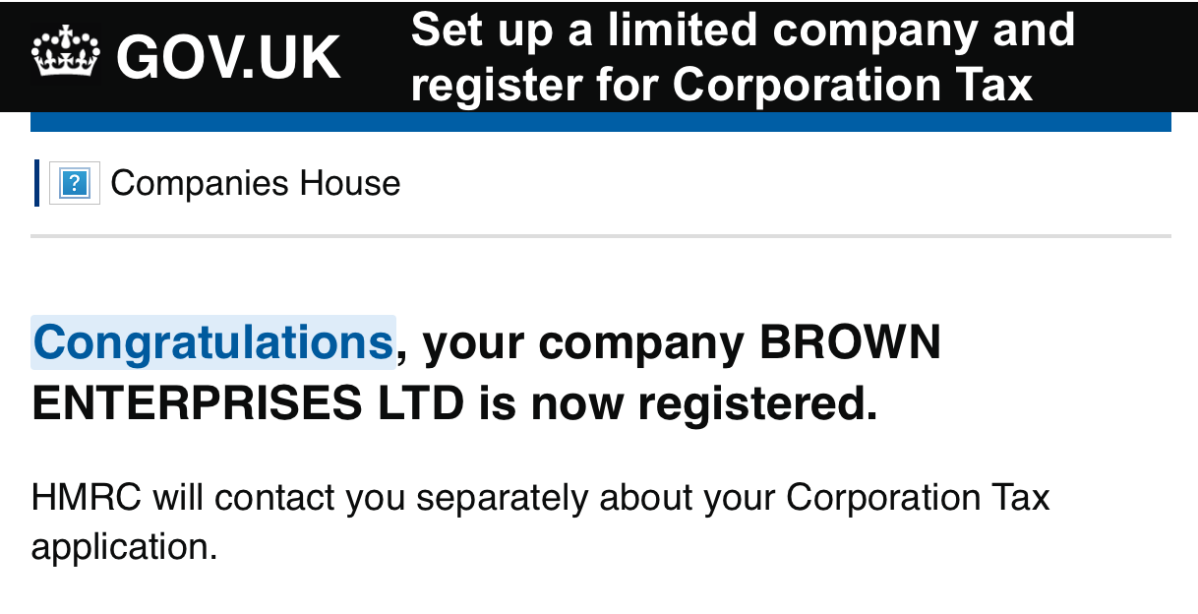
Step 1) Registering your business

The first step on the path to running your contracting business is to register your private limited company. A limited company is one which is legally distinct from its owners, has its own finances and can keep any profits it makes (unlike a charity). The private part just means that it is not traded on any public stock exchanges.

Why is it important to be a limited company? Well, you won’t be personally liable for any financial losses made by the business (for example if you were to take out a business loan and then be hit by some unforeseen event… like a global pandemic) and you can benefit from some tax advantages.

You can do all of this on the UK government website, gov.uk.

There are some commercial solutions out there which will do all of the “paperwork” for you and allow you to use their address so that your home address or office doesn’t receive spam after being listed on the Companies House (which is the UK registry of companies) website. I would suggest you don’t use these, I got exactly one item of “spam” when I registered using my home address and this feels like a decent trade-off vs spending more money to register and then having to have another company handle all your post and decide which stuff to forward to you, you really wouldn’t want to miss something important.

Step 2) Set up a bank account

Remember how your limited company is legally distinct from you? Well, that means it needs its own bank account. Pretty much every UK bank you can think of offers a business bank account. One thing to be aware of: Business bank accounts aren’t like most personal current accounts, you will be charged to bank and in some cases you may be charged per transaction.

The most important attributes to look for in a business banking account are that the charges aren’t too high, the charges are easy to understand and predict and that you can integrate with online accounting platform like Xero or QuickBooks.

I won’t make any suggestions for the best business bank account as it is a competitive space and anything I say will be wrong within a few days of this post going live (as financial products update quite often), but I will say that I opted to go for a Monzo Business bank account. This was due in part to my familiarity with them as I have my personal current account with them, but also as their pot system makes it really easy to keep your tax savings separate from the rest of your money.

Step 3) Get Insured

Every contract Software Engineering role I have looked at so far requires that any private limited company has at least £1 million of Public Liability Insurance and £1 million of Professional Indemnity Insurance. Whilst those look like scary numbers the actual cost of both sets of insurance for my company was only around £280.

Public Liability insurance protects you against legal action from the public if they are injured or their property is damaged as a result of your work or the actions of the software you build.

Professional indemnity insurance protects you from legal action from any clients who you work for who follow your advice or instructions and as a result incur a financial loss.

Hopefully the work you do won’t damage anyone, their property or their business, but you will still need this insurance for a few reasons:

1. Each contract role you take on will require evidence that you have the insurance. So you don’t have a choice.
2. Software is complex, if you haven’t mathematically proven your software (like Boeing and Airbus do for their software for aircraft) then you cannot claim to be sure of every result of running your code
3. Something bad doesn’t actually have to have occurred, and even if it does you don’t actually have to be at fault, in order for you to be sued. This insurance protects your company from ill advised legal action too.

I won’t even begin to advise on what to look for in insurance, this really is an area in which you should do your own research and buy a product you are happy with. However, I can advise that it only takes 10 or 15 minutes online to actually purchase these products so you could leave this part for once you’ve found your first contract if you don’t want to spend the initial outlay before you have money coming in.

As insurance is a legitimate business expense don’t forget to buy it using that shiny new Business debit card you just got. 😉

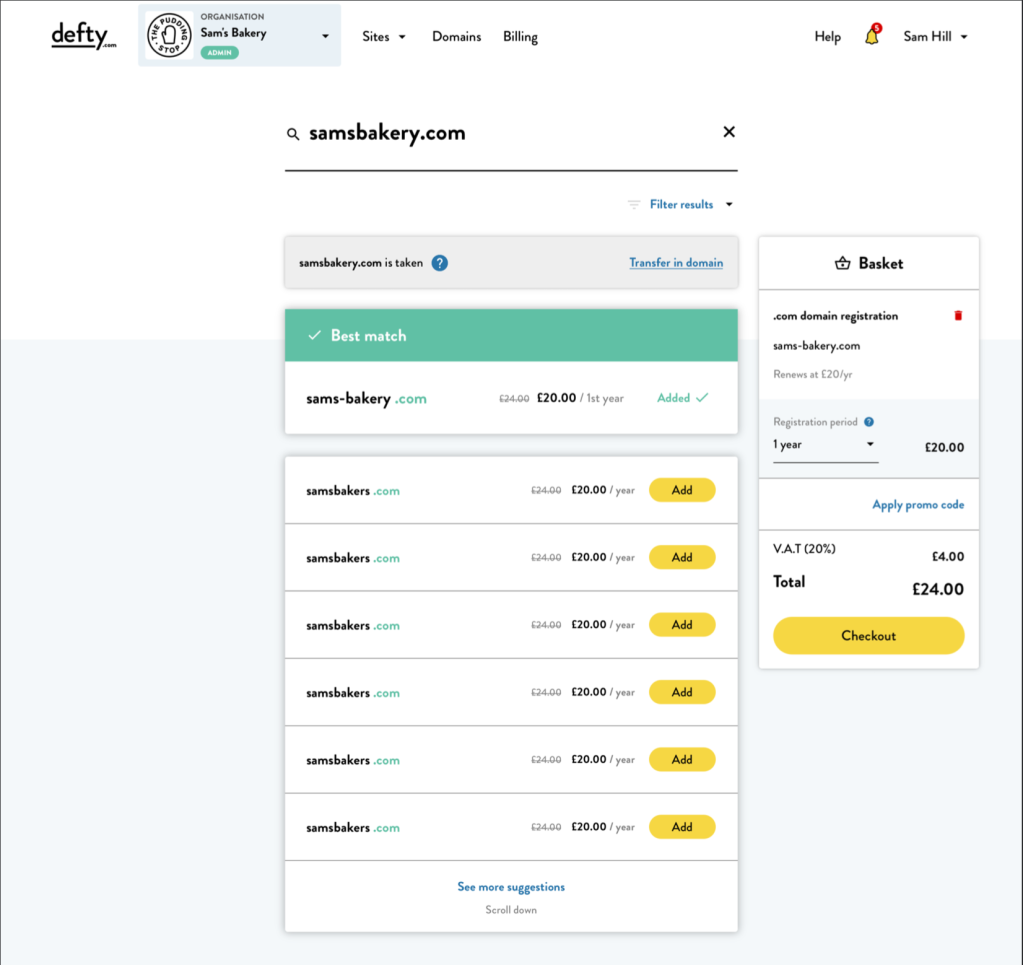
Step 4) Get yourself organised

Whilst working through the preceding 3 steps you’ll have noticed that registering and running a business involves a lot of paperwork. Now is the time to get all the physical paperwork together, scanned, stored and (optionally) encrypted. Now is also the time to make sure that your documents in a digital format aren’t strewn across 3 email inboxes and 5 computers.

I would recommend that now is a good time to buy yourself a domain name, an Office 365 / G Suite subscription (remember to buy this with your business debit card!) and use cloud storage. A nice side effect of this is that you’ll also have a nice professional email address for yourself in your capacity as a director of your own company, which looks cool and helps in getting other people to take you and your company seriously.

Step 5) Find that contract role

The next step is to find a contract role. This is much the same as finding a permanent role in that you are best off looking in multiple places (LinkedIn, applying directly, online job platforms, etc.).

My girlfriend and I have a YouTube video series coming out soon all about finding software engineering job roles. I’ll update this blog with that video soon.

Step 6) Retain a good accountant
So you’ve set up your business, set up a bank account, got insured, got organised and found yourself a great contract role. That has to be it right? Almost, there’s just one more thing to do but it may well be the most important part of setting up your Software Engineering contracting business.

An accountant does a lot for you. They help keep track of your expenditure and revenue, help you determine how much money to keep aside for tax purposes and perhaps most importantly keep you tax efficient (including registering your company for VAT).

Being tax efficient means that your company deals with money in such a way that you can, within the confines of the law, get the most value from your work. The difference between doing your own accounts and having a professional accountant can be tens of thousands of pounds in take home pay across a year.

Accountants can set fees and offer levels of service which are quite different from one another, it is almost certainly worth speaking to two or three before selecting one.

Only you will know what you want from your accountant but I will tell you what I looked for:

  1. Being paperless (e.g. using a good online platform like the aforementioned Xero or QuickBooks)
  2. Being easy to keep in contact with via email
  3. An ability to explain to me financial matters in a way I could understand
  4. An understanding of the software consulting business.

From here on in you’ll be required to keep track of all incomings and outgoings of the business by submitting invoices to clients and keeping receipts and invoices for products and services your company buys. I would advise looking for an accountant that uses ReceiptBank to keep track of receipts as it makes it super easy to take a photo of a one off receipt (e.g. a lunch when meeting a client) and have it automatically parsed by Optical Character Recognition whilst also allowing you to set it up to automatically download bills every month for things like internet and phone bills.

You should speak with your accountant to determine which purchases you can make as legitimate business expenses and keep in touch with them on a regular basis to ensure you are keeping enough money aside to pay the tax man at the end of the year. They will also advise you on how to pay yourself in order to get the most out in the most tax efficient way, this usually ends up being a combination of dividends, a PAYE payroll and setting up a company pension scheme (don’t worry, this is all a lot easier than it sounds).

Conclusion

Getting your limited company set up is the easy bit, providing a good service to your customers so they keep coming back is the hard bit, but at least if you use the above steps as inspiration you’ll be in a good position to enjoy that challenge.

I look forward to updating the blog with more about how my Software Engineering and Consulting company, Brown Enterprises, is doing.

Danny

Categories
Business

Unemployed to Managing Director in one easy step

Here’s a good tip for anyone out there hoping to make it to the top without much effort; you can become a Managing Director in just 1 day so long as you have access to a debit card and £12.

The gov.uk website makes it really easy to start up your own Private Limited Company in a step-by-step tutorial that explains all the technical terms to you as you go along. In just 15 minutes and with just £12 you can have your own separate legal entity for conducting business that provides you with limited personal liability. Then you can call yourself a Managing Director 😉

Obviously this is not the actual use-case and wouldn’t actually fool anyone but it is a nice way to illustrate just one of the ways the United Kingdom is the 8th best country in the world in which to do business according to the World Banks “Doing Business 2020” rankings.

Having spent the last 2 years running defty day to day I had been wanting to fill in the missing piece of the puzzle — registration. Recently I have been considering doing some contracting and consulting alongside trying out some business ideas of my own so now seemed like the perfect time… and for £12 and 15 minutes of effort, why not?

Danny

Categories
Defty

Defty: The easy to use website builder

After leaving DriveTribe I took on my first role as CTO at a start-up called Defty. As employee number 1 I took on the task of hiring the Engineering and UX/UI team, deciding our technical strategy and setting up quality assurance systems in addition to developing the platform itself. In this blog post I will show what we built before Defty was unfortunately shut down for commercial reasons.

A great site in 20 minutes for £20

Deftys target audience was small and medium sized businesses, particularly those that you can imagine being on your local highstreet, who needed a web presence but perhaps didn’t have the skills in house to get online or simply didn’t feel like they would get enough value from an expensive solution. 

Existing solutions made building a site relatively simple but had a few downsides that put small business owners off; they didn’t help with writing content, only worked from desktop computers and supported a myriad of options which sometimes resulted in confusing UIs — particularly for those small business owners who didn’t consider themselves technically savvy.

We wanted to make it possible to build a great single page website in 20 minutes or less — regardless of any existing technical knowledge — from any platform, including mobile phones. This was important as in most developing economies access to mobile phones is much higher than access to desktop machines and even in developed nations it would allow small business owners to work on their site between dealing with customers.

Finally, we wanted our solution to be economical, most fish and chip shops aren’t going to see a return on investment from a £100 website as only locals are likely to use them but they have a much better chance of returns from a £20 site.

IQ

Defty IQ

The first step of building a website on defty was internally referred to as “initial questions” or more often simply “IQ”. In order to generate the user a site tailored to their specific needs we ask a number of questions and stored their results. The cool thing about IQ was that the questions a user was asked depended on the answers they had already provided, so in a way it acted as a decision tree with side effects along the way.

Based on the answers provided we generated a site that we hoped would satisfy most of the users needs and only require a few copy changes to be made manually. Had we launched we would have tracked which changes a user made to their generated site to try and improve IQ for future users.

Builder

Once we had enough information to generate a site we placed the user in to our website builder. The builder itself allowed users to change any aspect of the site we had generated for them including colours, fonts, images and content.

Like everything we built this worked on any screen size from mobile all all the way up to ultrawide monitors. Users could hit preview to see what their site would look like from a mobile phone, tablet or desktop regardless of what device they themselves were on.

All the sites we generated for users were entirely static and hosted in S3 and made available to the world via the Amazon CloudFront. This meant there were no expensive services or databases to keep live and maintain for each individual website and would have allowed us to host sites for mere pennies per year.

Domains

Theres no use in having a good site if potential visitors cannot find it. To this end we also made it easy to purchase domains.

Suffice to say the intricacies of dealing with The Internet Corporation for Assigned Names and Numbers (ICANN) and the Extensible Provisioning Protocol (EPP) and all the various registries is outside the scope of this blog post, but it was an interesting challenge and it was interesting to peek behind the curtain of how this pillar of the internet works.

Everything else

As well as the two major product features of site building and domain purchase and management we of course built all the surrounding infrastructure too. Authentication, organisations, checkout and billing, an activity feed, password reset flows, continuous integration, an entire admin dashboard and all the rest.

I would like to thank the wonderful team I had at defty for all their hard work and I wish them the best of luck in the future.

Danny

Categories
Blogging Computer Science

I’m 90p up! Adverts on CS Blogs

Unfortunately it took 2 months to make that 90p!

Since Rob and I rebuilt CS Blogs in 2016 neither of us have really done a lot with it. Whilst I am accountable for some of the 3,000 monthly page views the most I have done with it operationally for some time has been to ensure that the servers & domain keep being paid for.

I think that at some point because of this I started seeing CS Blogs as an expense which I should try to break even on despite the fact that it started as a labour of love.

To try and recoup to small amount of money I throw at it each year I thought I could simply include the Google AdSense Auto Ad script and let that take care of monetisation.

Auto Ad itself is quite nifty and takes all of the effort out of adding adverts to your site whilst still giving you enough flexibility to tailor them to your content and audience. However, just plugging in adverts was somewhat low effort and so unsurprisingly didn’t yield good results. I would go so far as to say that adding adverts was a negative as it didn’t cover the CS Blogs bills but did have a negative impact on the user experience.

To put the matter right I have now removed all ads from the platform and will be taking another look at ways to improve both the software and the reach of the platform (perhaps by marketing directly to Computer Science departments around the UK).

If you’d be interested in helping with these efforts please get in touch.

Danny

Categories
Life

The Worst UX of any product I’ve used

I’ve spent much of the last year thinking about how to improve the user experience of a product I have been working on (more on that in future post). 

One of the most important things to consider when crafting a user experience is the context in which the user interacts with the product.

A prime example of why context is so important when designing a product is the electric hob built-in to the counter top of the kitchen in my flat. One of the choices that the manufacturer would have had to make was what form the buttons would take — unfortunately they didn’t take the context in which the hob is used into account and therefore made the wrong choice.

On first look the hob is quite stylish — but let’s be honest, its a hob — and features touch buttons for the power button and heat selection. Whilst the touch buttons are quite attractive, and easy to clean, they fail to register touches most of the time. Not ideal when they manage the heat being applied to boiling pots of water. But why is this?

Touch buttons fall into two broad categories, capacitive and resistive. Resistive touch buttons use the pressure of your finger to register a touch whilst capacitive touch buttons measure the electric field generated by your finger.

The hob manufacturer opted to use capacitive touch buttons for the hob. What they failed to take into account was that capacitive touch buttons register for any conducive material including one which is often found in kitchens — water. This means that the situation in which you want to affect the heat quickest, e.g. when the pot overboils, you cannot! Sometimes you continue to be unable to use the button even after it appears to be dry, it is incredibly sensitive to water.

This means that whilst the product looks fit for purpose and likely works well in a situation in which there are no spillages (for example in the manufacturers R&D facility, or the shop in which it is demonstrated to customers) in real life it causes a lot of unnecessary problems and is a regression from hobs that had physical buttons.

I hope this blog post comes to mind when you are next making decisions around the user experience of a product you are working on and you remember to imagine not just the user using your product, but the context in which they do it and what they are trying to achieve whilst using your product.

Danny

Categories
DRIVETRIBE

DRIVETRIBE MyGarage

During my time at DRIVETRIBE I primarily worked on a feature called MyGarage which allows people to upload a complete history of their vehicle ownership as well as their dream vehicle and any vehicles they have for sale.

Each vehicle upload consists of an image, make and model. Optionally a user can add the model year, year of purchase and a text description. Uploaded vehicles can be liked and shared by other users, and they can comment to ask questions or provide opinions. The makes and models can be from a list of known brands or a user can input a custom value if they have something particularly rare.

Vehicle Upload Screen - Desktop
Vehicle Upload Screen – Desktop

The feature has two main benefits, one being that users enjoy the feature and spend a lot more time on the website if they can interact with their own garage and comment and share other peoples. Secondly, DT gets access to a wealth of data about its users; such as how often they get a new vehicle and what they would really like to buy in the future.

I worked on the front-end portion of the feature on DTs responsive website such that it worked both on mobile and desktop browsers. The front-end was written in React and utilised the very cool Styled-Components library, which I enjoyed using.

Garage Page View - Mobile
Garage Page View – Mobile

One of the most exciting parts of working on this project was that it was announced to the world by James May of Top Gear and The Grand Tour fame. A competition was also ran where a user could win (a model of) their dream ride and the winner was announced by Richard Hammond.

I hope a lot of people get a lot of enjoyment from this neat feature.

Danny

Categories
Conferences

#TechDaysOnline

I was invited to talk at Tech Days Online at the Microsoft Reactor in London today on the topic of Microservices.

Rather than a presentation format the talk was as part of a conversation moderated by Christina Warren, Senior Cloud Dev Advocate for Microsoft.

Being live on Channel 9 — Microsofts online TV channel — was somewhat nerve racking but I think it went quite well and I enjoyed the format.

Thank you to everyone involved in the production, I had a lot of fun!

Danny

Categories
Flying

First NavEx (Turweston – Cambridge)

I was planning to do some more solo circuits on Sunday, however in the end I got to do something even more fun! Instructor Bill rang me in the morning to ask if I would like to go to the flight school earlier and share a navigation exercise with fellow aviation student Terese. Of course I wanted to! The plan was for Terese to fly the outbound leg and for me to fly back.

I was somewhat nervous as I hadn’t done any navigation before and had only watched a few videos online about the basic concepts, but felt better as I would get to see navigation skills in action before having to use my own.

The method of navigation you use for flying under visual flight rules is called Dead Reckoning. In simple terms dead reckoning is using speed and heading to determine where you currently are in relation to a previous known landmark. Therefore, the first thing you need to do to create yourself a route is find landmarks that will be easily visible from the air and ensure that the route between them will not pass over any restricted airspace or gliding activity.

When I arrived at the Mid Anglia School of Flying briefing room Terese and Bill had already selected a route to get to our destination of Turweston from Cambridge.

Cambridge to Turweston Route

Now that a route was selected the three of us worked together to determine the track headings, which you can think of as compass headings, that we would follow at various stages of the flight. We then made adjustments for magnetic changes across the route and forecasted wind. Using the heading, distance and weather information we had acquired we could work out the estimated time between each landmark we would see enroute. All of this was noted down on a document called a flight log.

Flight Log for Turweston to Cambridge

As it was my first time doing it, and Terese is also fairly green, filling in our Flight Log took almost as long as the flight was planned to! But time spent planning is always worth while, much better than spending time and fuel going in the wrong direction — or worse.

On the outbound trip I was sat in the back of G-BFWB. I hadn’t sat in the back of a PA-28 before, but even at 6ft 3 I was pleasantly surprised by the leg room! As Terese got to grips with the ultimate multi-tasking challenge of flying a plane whilst looking for landmarks and filling in actual arrival times on the Flight Log I was able to enjoy looking out the window at some familiar places, including; Grafham Water Water, Milton Keynes, Northampton and the Silverstone Formula 1 track.

Grafham Water from the air

When we arrived at Turweston I was pleasantly surprised by the airport! I’m not sure what I was expecting but I certainly didn’t expect it to be a flash as it was. It certainly helps that it is the closest airfield to Silverstone for the Gran Prix fans who arrive in their private jets and helicopters.

Terese in front of the Turweston Tower which is home to ATC as well as a cafe

The staff at Turweston were also great! The gentleman with whom we had booked out came to meet us at the plane and took the photo of the three of us which is at the top of this post. In order to pay our £15 landing fee we had to go to the Control Tower, which I was quite excited about!

View of the runway from Turweston Tower

Turweston as a small airport which exclusively caters to General Aviation doesn’t have a full Air Traffic Control service that big commercial airports such as Heathrow might have, but instead has a “Radio” service which is a little more casual and can only advise aircraft what to do, rather than tell them and provide clearances. For a bit of fun we rated some of the landings coming into the airfield, with ATC providing scores to the pilots themselves.

View of G-BFWB from Turweston Tower

Before leaving I told the controller on duty I would be flying out and apologised in advance 😉. Having been spoilt by Cambridge Airports 1965m runway Turweston felt comparatively short at 1000m, though clearly more than enough to take off in a PA-28.

Flying back I realised the sheer amount of work involved when thinking about navigating as well as aviating as someone so new to both. At one point I even told ATC I was heading “west” for Cambridge, despite the lack of fuel or onboard toilet facilities required to circumnavigate the globe.

Despite the amount of thought required it was however terrific fun and a bit of a rush when I was overhead the M1, my first landmark, enroute and only a minute behind my estimated time of arrival! After that I was looking out for Podington Wind Farms and then Grafham Water where I changed course to get to Cambridge Airport (all detailed in the aforementioned Pilot Log).

When I got to Cambridge I got into the circuit through a standard overhead join and Terese captured my landing on video.

Thanks to Terese and Bill for a great day of flying! We all agreed we would do it again as it is helpful for Terese and I to watch each other learn, and it means we can go farther-a-field to new and exciting airports like Turweston. Hopefully next time we shall arrive at our destination 10 minutes before the Cafe shuts, rather than 10 minutes after!

Danny

Categories
PepperHQ Software Engineering

Code-defined infrastructure

In my blog post about DevOps I argued that a good Software Engineer knows not only about his code, but about how and where it is going to be ran. In the past I have been guilty of having an idea which service I might use to run a particular application (usually Microsoft Azure as I get big discounts as a former MSP) but not having had a full idea of the exact environment said application will execute in.

Recently I have been treating infrastructure as a first class citizen of any project I work on using the process of code-defined infrastructure. Instead of manually provisioning servers, databases, message queues and load balancers  — as you might do when using the AWS Console or cPanel on a shared webhost — I create a deployment script and some configuration files. I have actually banned myself from manually creating new instances of anything in the cloud, in order to avoid unwittingly allowing any single instance to become a Pet.

Defining the infrastructure required by any given application in code has a few advantages:

  • If someone tears down an environment by mistake we don’t have to try and remember all of the configuration to relaunch it. We have it in code.
  • We can easily spin up new environments for any given feature branch rather than being stuck with just “staging” and “production” environments.
  • Infrastructure changes show up in version control. You can see when and why you started shelling out for a more expensive EC2 instance.
  • At a glance you can see everything an application requires and the associated names. This makes it easier to be sure that when you’re deleting the unhelpfully named “app” environment it won’t affect production.
  • Scripting anything you can imagine is a lot easier, such as culling servers with old versions of an application programatically.

Introducing code defined infrastructure on one of our greenfield projects at PepperHQ has already paid dividends and the team has a desire to back-port the infrastructure management scripts and config files I developed to other services.

PepperHQ Deployer
PepperHQ Deployer

I developed the system with the idea of a git commit being the true “version” of a given application and that all infrastructure associated with a given version should be totally immutable. In order to deploy a new version of our new greenfield system you don’t upgrade the application on the server, you create a whole new environment with the new version on and then delete the old one — or keep it around for a hot swapping back in the event of an issue.

Pepper whats-live
Pepper whats-live

The infra-scripts also allow you to see what is live identified in a way useful to developers — by commit id and message. Other features include turning any environment into “production” or “staging” by updating their CNAMEs through AWS Route 53. When using the yarn terminate to kill a particular environment checks are ran to ensure you’re not deleting “production” or “staging”. The scripts are developed in TypeScript using the aws-sdk npm package.

Whilst this approach does require some more up-front investment than just manually creating environments as and when you need them, I recommend any developer writing systems people will really be relying on at least investigates this approach as there is a very quick return on investment. Some more out of the box solutions you could look into are Chef and AWS CloudFormation, though I ruled out using these for Pepper based on our internal requirements.

Danny

Categories
Flying

Flying Video

My brother posted a video to YouTube of when he came flying with me some time last year. You can watch it above.

Danny